

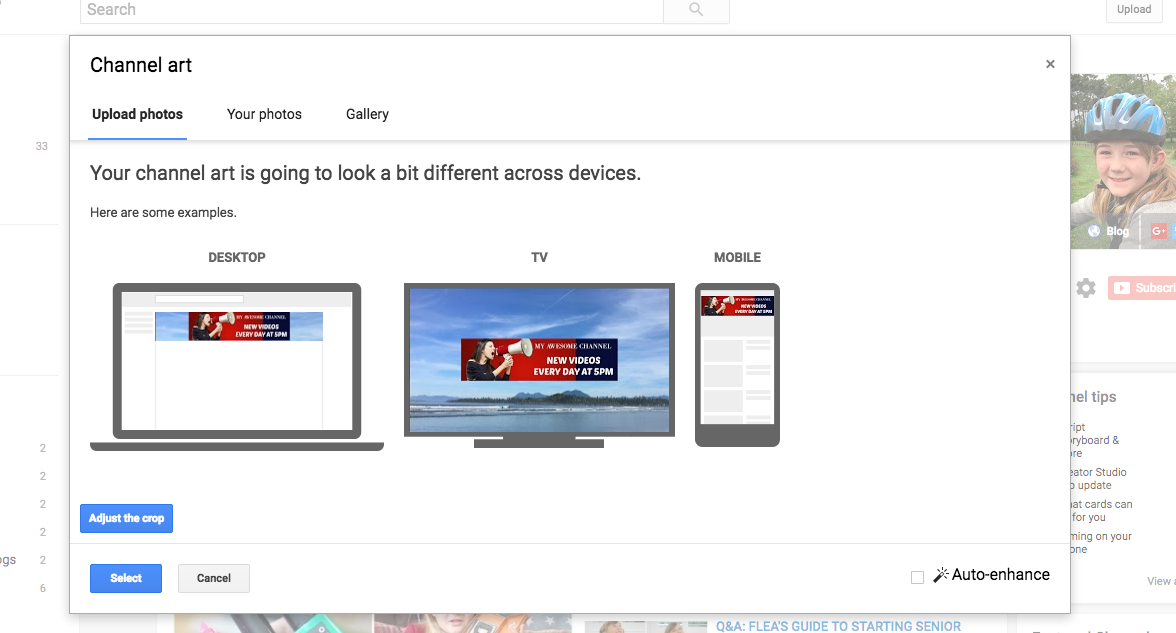
It’s a fact of life that changing your YouTube channel art is more complicated than you’d think.
That’s because YouTube asks you to upload a single, large image that will be cropped in different ways depending on how someone is looking at your channel – on TV, computer, tablet or mobile phone.
I’ve been asked to share a simple tutorial for making and adding channel art – so here goes.
Step 1
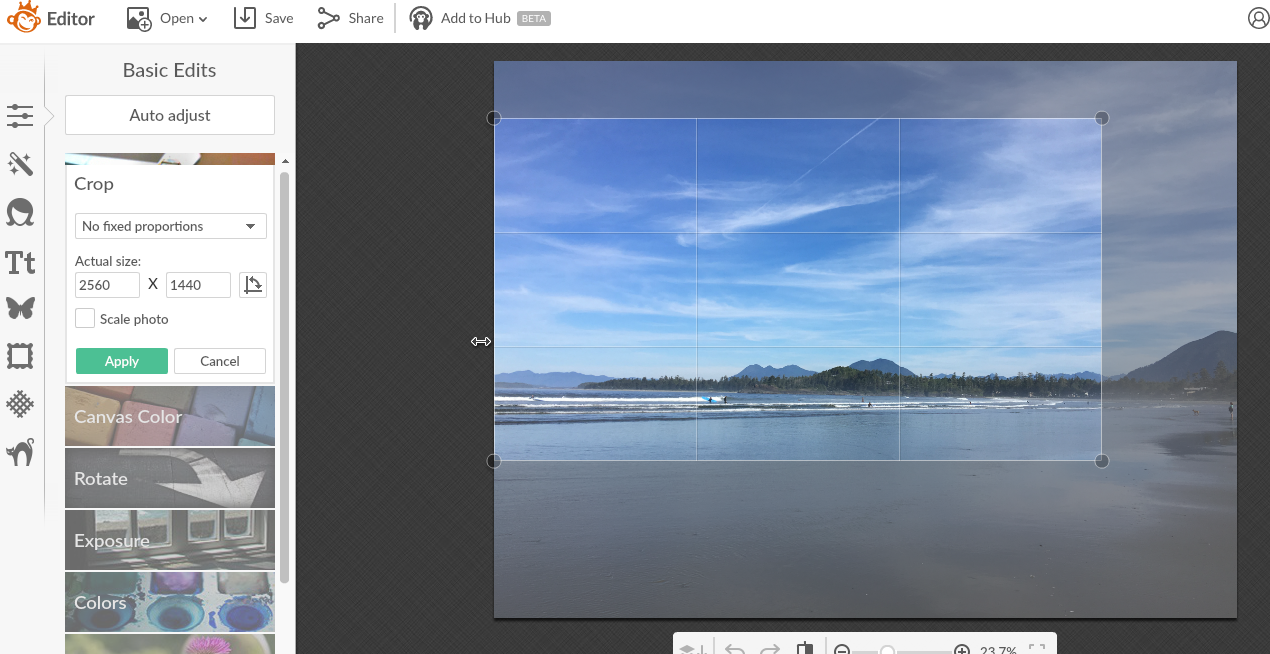
First of all, you need to find your big channel art image – this image needs to be exactly 2560 x 1440 pixels. This image is really just background, so it needs to be something you can crop a LOT, without spoiling the effect – so no close ups, or pictures of faces/people.
In this instance, I’ve chosen a beach photo – it’s pretty, but I can chop out 80% of this picture and it’s still a nice photo of a blue sky. I’ve resized it in Picmonkey to exactly 2560x1440px.
Step 2
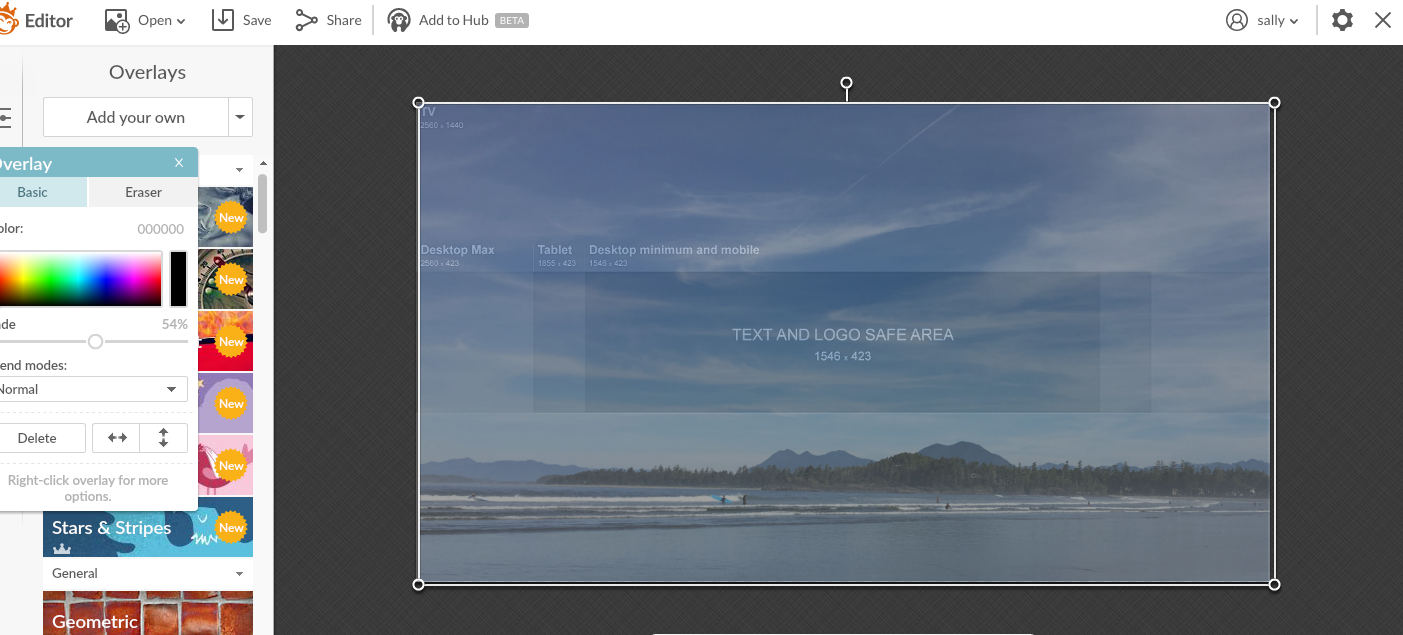
Next, you need to head over to YouTube and download their Channel Art template. This will give you a PSD and a PNG file to use as a template for your image. I suggest uploading the PNG image into Picmonkey, and then adding your background picture as an overlay using the “add your own” button.
Then use the sliding “fade” adjustor to make your photo semi-transparent (just for now). This means you can still see the YouTube template underneath.
Step 3:
Now you know you have a background of just the right size, you’re going to add your key images into the design. At this stage, you’re looking to make an image that’s 1546 x 423 pixels. Don’t worry that this image is too small for bigger desktops or tablets – those viewers will see your key image, and any space not filled by your image will simply display your nice background.
In this case, I’m using Picmonkey to make an image that will appear in the “safe area” space, with some text. So long as the image you make is 1546 x 423 pixels, you’ll be set! Save your key info image to your computer once it’s done.
Step 4:
Now, go back to your Picmonkey background image, and use the “add your own” overlay button again. This time, add your key info image. Use the semi-transparent template as your guide to make sure your key information is in the right spot.
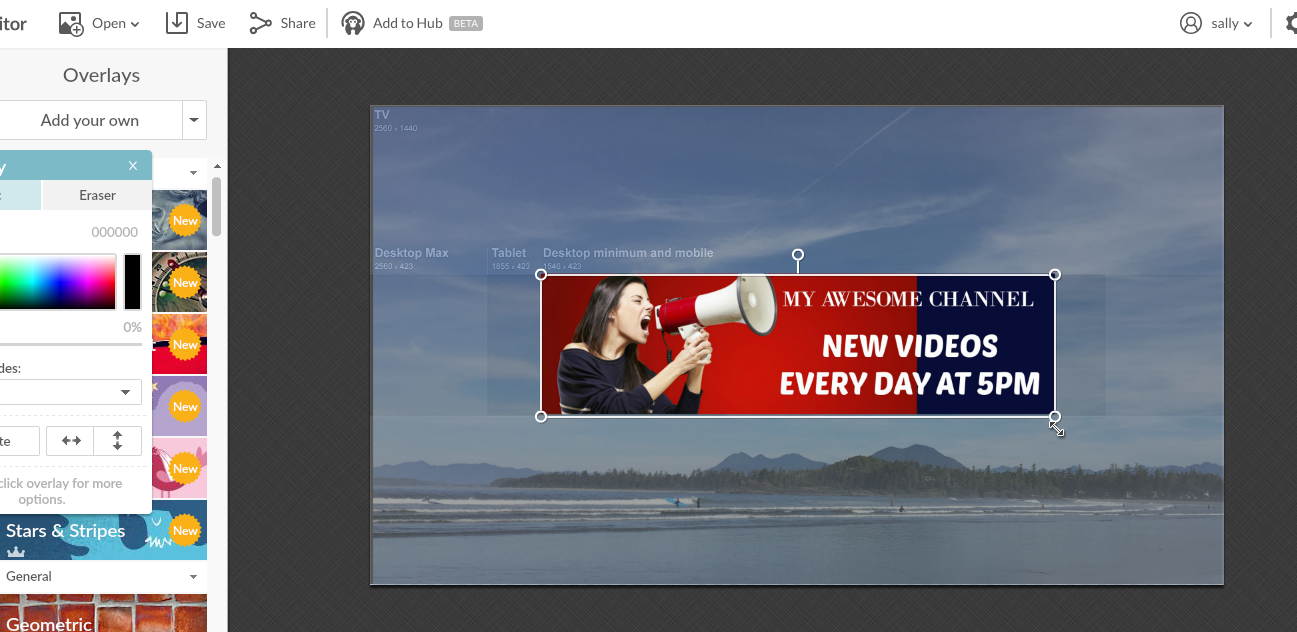
Once you’re done, adjust the ‘fade’ level on your background photo so it’s no longer faded, and save the file. Be sure you’re saving the final image at the right dimensions – 2560 x 1440 pixels.
Step 5:
In your YouTube account, click on the pencil icon in the top right corner of the current channel art space and select “edit channel art”.
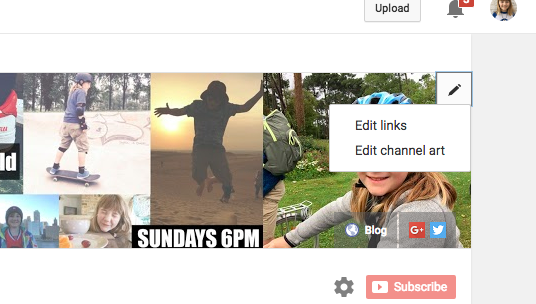
Select upload and choose the image you just saved – you’ll see a preview of what the channel art will look like. If you’re happy, just click “select” and your channel art will be all done!
Simple as that! Your background and key info images can be as simple or complex as you like – but so long as you ensure they both fit into the relevant spots on the YouTube template, then you’ll have fresh channel art whenever you need it.
Here’s a video to show you exactly how it’s done
Like this tutorial? I’d love you to visit my YouTube channel and say hi! If you have any questions, let me know in the comments!


Ohh! You clever thing….
YouTube does not make things easy when it comes to their channel art….I’m going to have a mess around with mine over the weekend using this guide. Thank you x
When I made mine I spent ages going back and forth between YouTube and Picmonkey trying to get something that would fit. It definitely isn’t perfect, so you can guess what I’ll be doing tonight.
Thank you Sally for taking the time on doing this.I got there in the end, after threatening my Chromebook with being replaced by a Microsoft machine.
That is exactly what I need. Well, that and some fab editing skills. And a better camera face 😉 Thanks though, this is useful